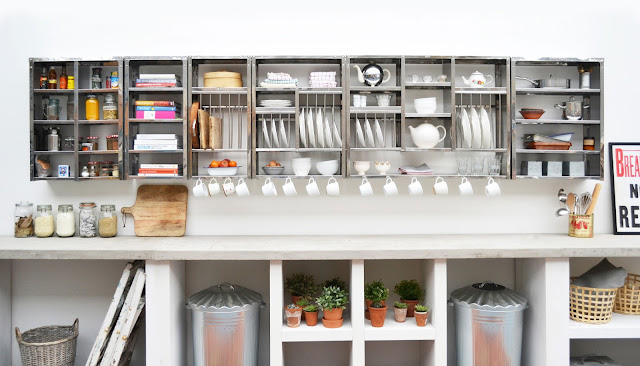
I wanted to build a versatile kitchen counter in my workshop, so we could get some new photos of our plate racks. I feel like i'm the last person on the planet to hear about this stuff, but I saw a tutorial on using Ardex feather finish concrete and I was completely sold.
The main draw being, you can just put it straight onto your existing counter tops. We built ours from scratch, but if you were doing this in a kitchen, I think you'd just key the surface of the laminate or formica first.
I've put together my DIY, but please note, at this stage, it's only for photo shoot purposes and I haven't completed the sealant step yet. I'm really pleased with the finish of it and found it so easy to use that it's definitely going to be the next project we do in our house.
The first thing we did was build a wall for our backdrop.
I worked out how I wanted the base of my kitchen units to look. It's 16ft wide in total, but made in 3 parts so can be used in different configurations.
We built the kitchen unit….( and hung the racks because I was over excited!)
Painted the wall.
Then the fun began!
These were the tools I used to mix and spread the concrete.
I put a couple of inches of water in the bucket and added the Ardex powder until I was happy with the thickness. I don't think you can really go wrong, Just work quickly as the concrete starts setting immediately!
I pretty much emptied the bucket over the counter first as it enabled me to spread it quicker. I used really thin layers as I found it easier to manage.
Cover the whole top as smoothly as possible.
But don't worry too much about lumps and bumps as these can be sanded/ sponged out in the next step.
At this drying stage, I used a damp sponge and wiped over the whole surface, it meant less time sanding. It probably made the layers thinner, but I think it helped the overall look and I will definitely do this step again when I'm making the counter tops in my house.
Once it's dry, sand it down! This was my favourite part as you can really start shaping the corners if you need to. ( I rushed mine a bit as some patches aren't dry yet, but I don't think it caused any problems. )
A sanded, smooth (ish) edge.
Repeat with another few layers. I think I will do 5 or 6 thin layers in my kitchen.
That's as far as I needed to go for my photo shoot counter top! But I found this brilliant tutorial during my research, it might help with the next step -sealing the countertop.
For now, here are my concrete countertops! And last but not least, the world's greatest plate racks!
Friday, 16 October 2015
Wednesday, 1 July 2015
Interior Inspiration
Thank you 'Access London' for featuring us on your website. We love our write up in Keaton's Lifestyle Magazine! Click here to read in full
Tuesday, 30 June 2015
Funky Shelving at Homify
Thank you Homify for this feature below! If you've not visited their site before, it's well worth a look. It's full of inspiring houses and is a great source for any decoration projects!


Tuesday, 26 May 2015
Our Racks !
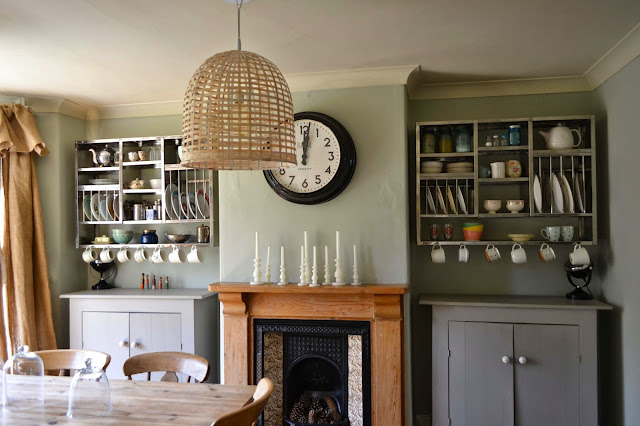
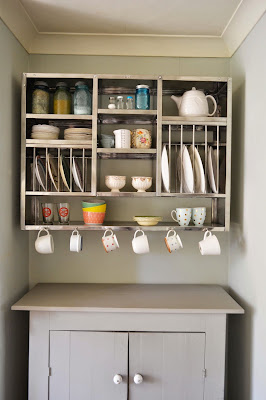
We've been in our new house around 2 months now. It's still a complete work in progress, but we've got our Mighty racks up in our kitchen and i'm pretty happy about it!
Tuesday, 19 May 2015
Show us YOUR racks
We absolutely LOVE seeing our racks in their new homes! Always makes me want to rearrange mine.
See them up close here...
See them up close here...
Monday, 7 July 2014
Feeling a little Colourful
Hanging out with our new colourful racks in the sunshine has got me all colour crazy
I love the pops of colour in this kitchen.
 |
| images from the amazing Fjeldborg blog. |
Friday, 4 July 2014
Buttercup and Jetty
We've got a couple of new colours up on our website. A happy, zingy yellow and a lovely moody blue. Along with old friends, Frangipani White and Seafoam Green.
Thursday, 13 March 2014
Mum's the Word
There are exciting floral plans in the making from my sis, watch this space!
Labels:
indian plate rack
,
stainless steel plate rack
Wednesday, 5 February 2014
The Coral Club
I've got a bee in my bonnet that a dip dye plate rack would look amazing! maybe in coral…Here's my colour inspiration.
1: Castle and Things cushion 2: Hay Chair 3: Ferm Living, House of Money 4:Castle and Things striped pillow case 5:Round cushion, Ferm Living 6: Hay file 7: Ombre foot stool cover
1: Castle and Things cushion 2: Hay Chair 3: Ferm Living, House of Money 4:Castle and Things striped pillow case 5:Round cushion, Ferm Living 6: Hay file 7: Ombre foot stool cover
Labels:
colour inspiration
,
Plate rack colours
Saturday, 1 February 2014
Subscribe to:
Comments
(
Atom
)


